
 |
| The Look |
I find that my biggest time trap of my makeup routine is eyeshadow application. My intentions are always pure...grab a quick and easy neutral palette...ok, apply a simple taupe shade to the eyelid...now maybe add a lil plum...and a matte brown of course, oh and I'll just deepen up my outer v just a little....And before I know it, 45 minutes later...I'm late. My best bet to getting out the door in a hurry is to skip the eyeshadow all together.
So what's my solution...FACE PRODUCTS!
I'm already applying my concealer, bronzer and highlighter anyway, so I might as well use them for a quick and simple eye look! This subtle, yet polished, eye look is my solution to avoiding those complicated smoky eyes, and getting out the door in a hurry.
The Products...


Rimmel Stay Matte Long Lasting Pressed Powder in #001 Transparent
NARS Bronzer in Laguna
The Balm Mary-Lou Manizer
Maybelline Age Rewind Eraser Treatment Concealer in #60 Brightener
Cover Girl Liquiline Blast (deep purple shade)
Stila Kajal Eye Liner in Topaz
Prestige My Biggest Lashes Mascara (in black)
The Tools...
 |
| pointed cotton swabs, various brushes, ELF Eyelash Curler |

from left:
Cotton Swabs- I prefer to use pointed cotton swabs because of the extra control they give me when smudging out my eyeliner but regular cotton swabs will work just fine.
Sigma Blending E25 brush- medium size blending brush
Sigma Tapered Blending E40 brush- large fluffy brush
The Tutorial...
 |
| I have already applied my foundation, setting powder, and filled in my brows. Even when I'm in a hurry, I always fill in my brows. Well groomed brows make even the simplest eye makeup look polished and pulled together. A makeup routine must for me. |
 |
| I apply a highlighting concealer to my inner corner and under my brow bone to add some extra brightness to my eye. This is the same concealer I use for under my eyes. |
 |
| I dust a small amount of setting powder on my entire eyelid using a fluffy brush. This acts as my eye primer when I'm pressed for time. |
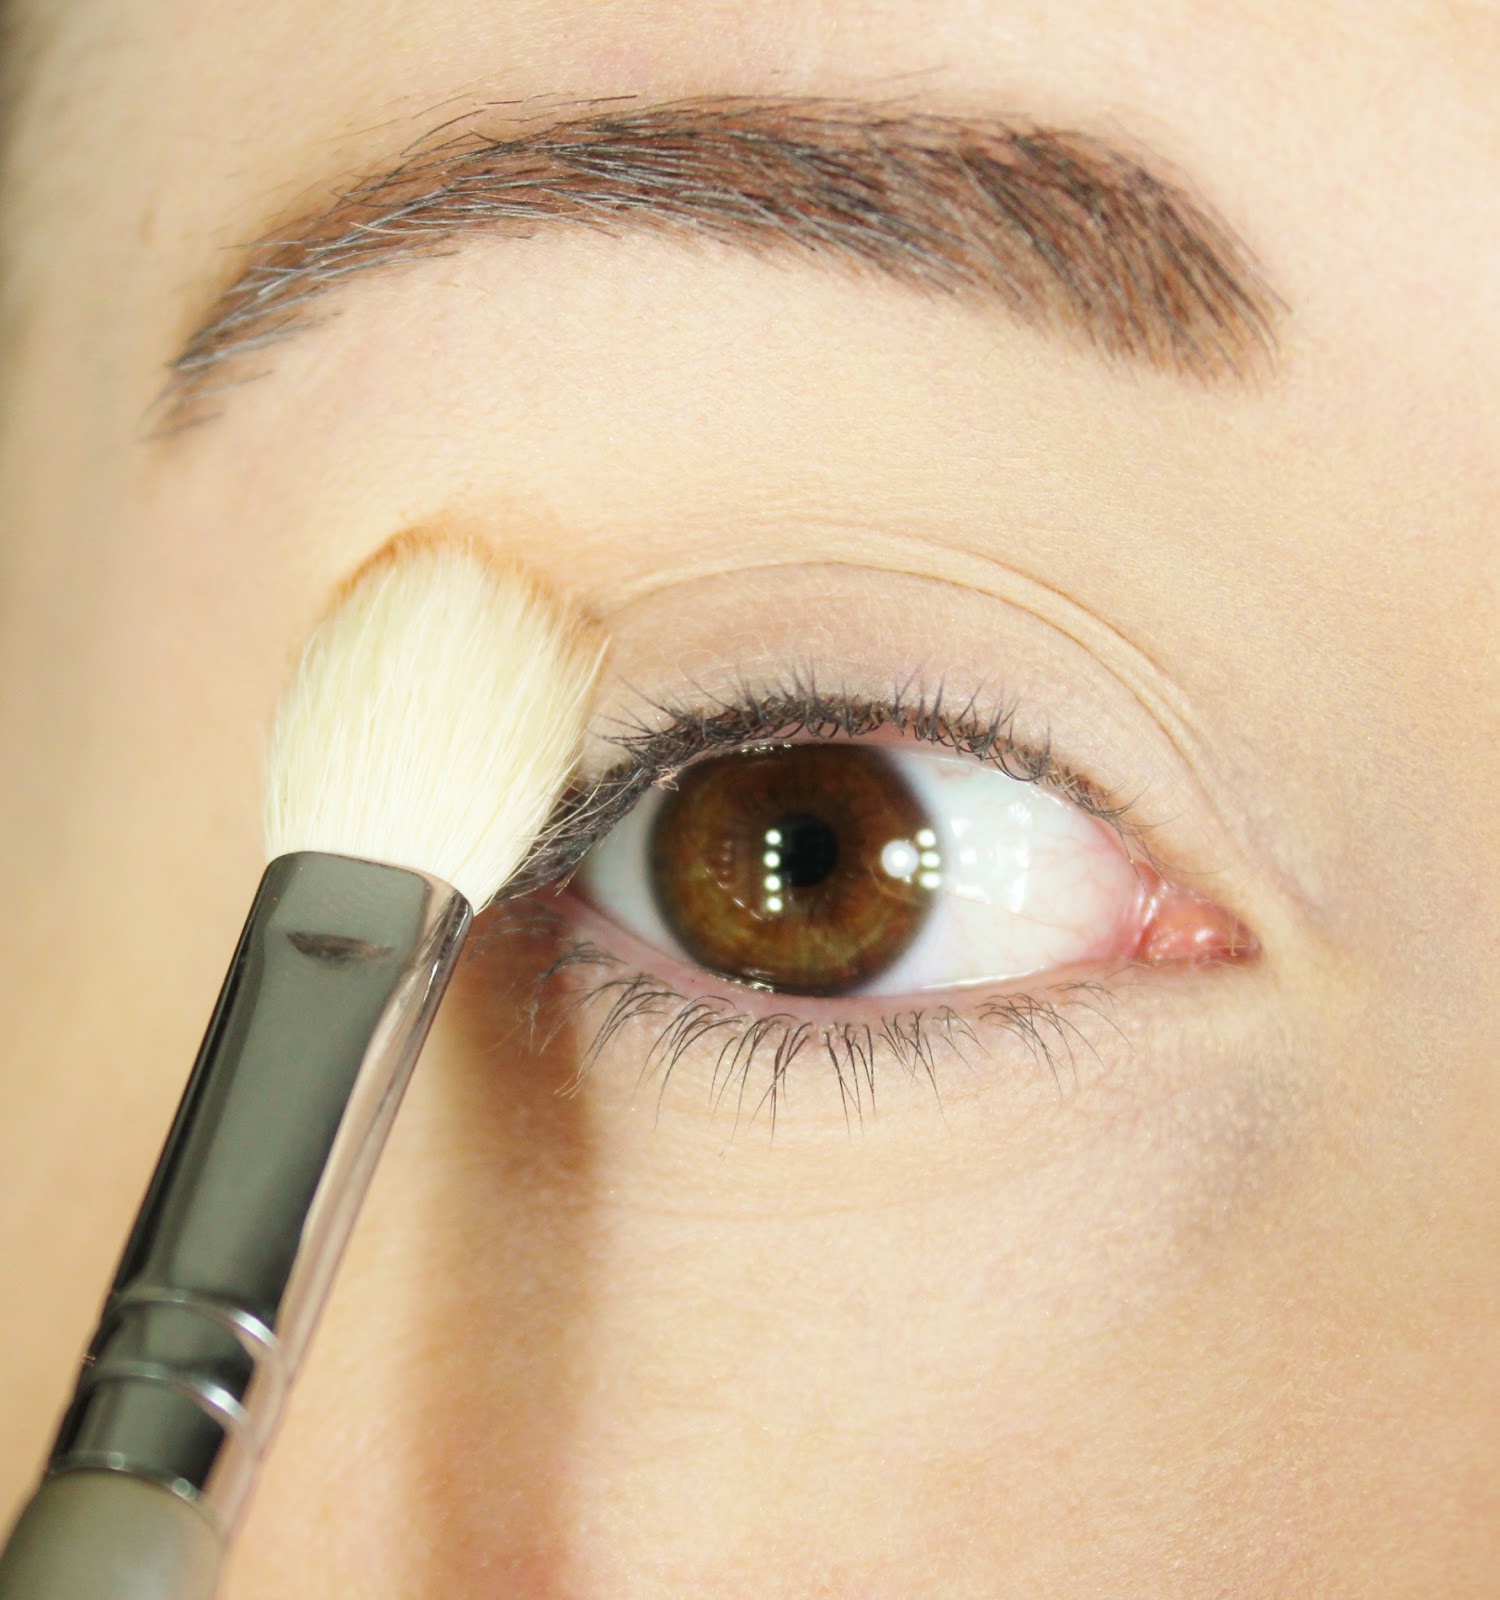 |
| Using a medium blending brush, I apply my face bronzer to the crease of my eye, blending up towards my brow bone. I like to apply a couple of layers of bronzer to build up to my desired color concentration and definition. |

 |
| I blend out any harsh lines with the same fluffy brush I used to apply my setting powder to my eyelid. |
 |
| Using bronzer in the crease adds soft, natural definition to my eye. |
 |
| Using my finger, I tap a small amount of my face highlighter on my inner corner, brow bone, and the center of my eyelid. |
 |
| This gives my eye a more highlighted and lifted look. The subtle contrast of the bronzer and highlight brings out the natural shape of my eye. Its basically just contouring for your eyes! |
 |
| Lightly blend out any harsh lines |
 |
| finished "eyeshadow" look |

 |
| I quickly smudge a long-wear pencil eyeliner on my upper lash line. For this really natural eye look, I chose a deep purple eyeliner to add a pop of color and interest to my eyes. I love the way this liner pairs with my brown eyes. |
 |
| I smudge out any harsh (or wonky) lines with a pointed cotton swab. A regular cotton swab will work just fine, I just love the extra control these pointed swabs give me. |
 |
| I smudge a bit of purple liner on my lower lash line... |
 |
| and lightly smudge it out using the other end of the cotton swab. |
 |
| I love adding a peachy kohl pencil to my waterline. This makes my eyes instantly appear bigger, brighter and more awake. |
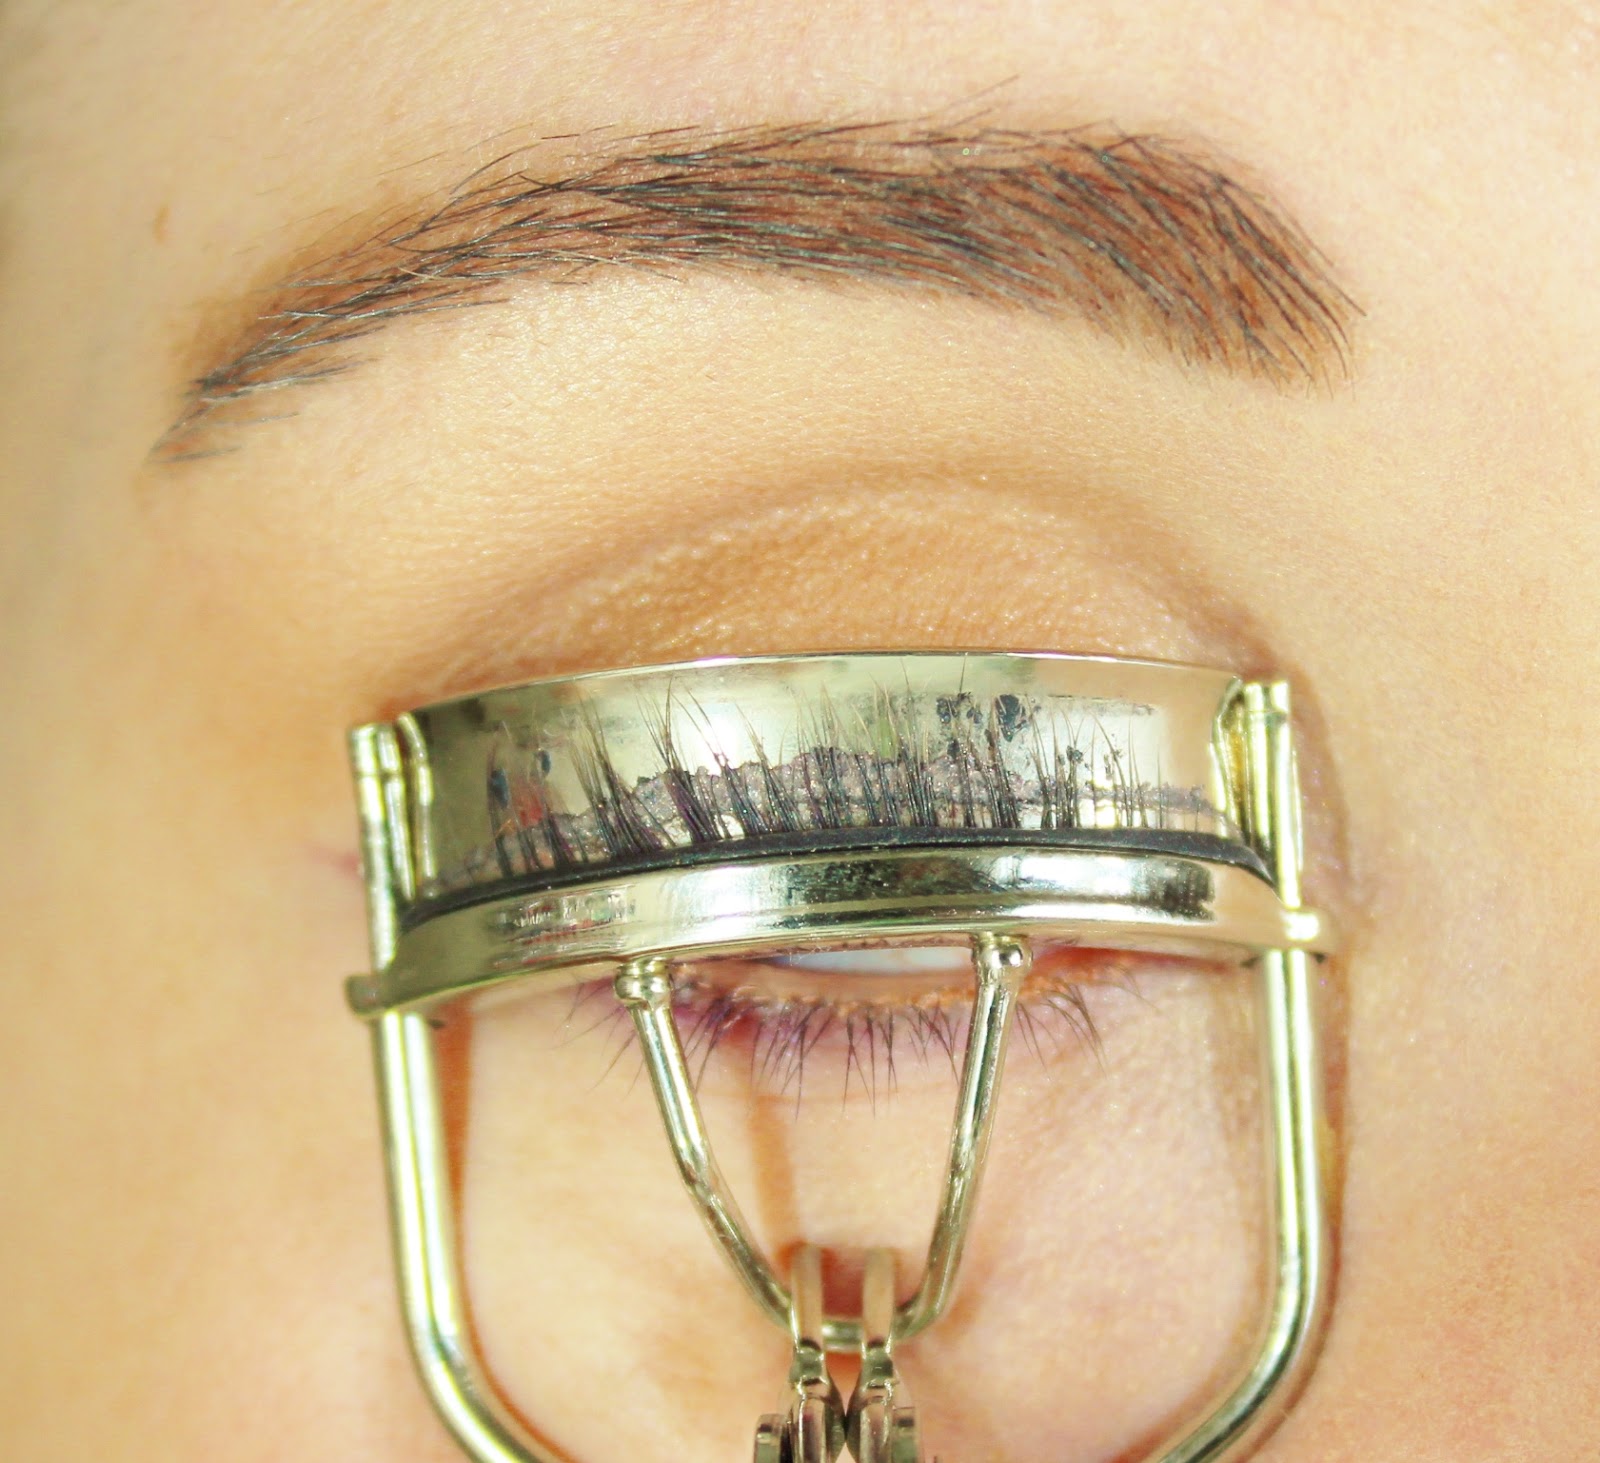 |
| I always curl my lashes and apply two coats of volumizing mascara to my upper and lower lashes to give me a more dramatic effect. |
 |
| The Finished Look |

Thanks for taking the time to have a look at this tutorial! Comment down below and let me know your "out the door in a hurry" tips and tricks
This is an amazing post! I love that you've done step by step pictures so we can do this look at home. I need that eyeliner :D xx
ReplyDeleteGemma ♥ | Miss Makeup Magpie
Thank you! I'm so glad you found it helpful! I love this eyeliner...and it lasts all day too. Thanks for taking the time to read my post and comment!
DeleteI agree with Miss Makeup Magpie up there, this is a fabulous post with gorgeous pictures and very useful tips! Your eyes have got a beautiful shape by nature, but you are also very good at enhancing them with make up...I am a bit envious here because my eyes are on the droopy and hooded side and I am always struggling with eye shadow or eyeliner application (especially on the bottom line). Any tips? x
ReplyDeleteAlice
Hi Alice, thank you for the compliment, you always have such sweet things to say. I sent you an email with a couple of tips I've picked up for hooded eyes, I hope it helps!
DeleteI love this post! So easy to follow and as always, you take great photos!!!
ReplyDeleteAlso love the idea of color eyeliners :)
xx
Jessie
Thank you so much! I'm so glad you found it helpful! I think this shade of eyeliner would be beautiful on you!
DeleteThis is really pretty! I love that it's so simple! Great post!
ReplyDeleteKendra
www.beautybykendrac.com
Thank you so much!! I love easy looks like this!
Delete